

I haven’t travelled by myself in awhile not since my 200hour teacher training in Sydney back in 2014.
My destination : NEW YORK CITY to attend Baptiste Yoga Level 2 in Menla, Phoenicia - which is about 3 hours drive from Manhattan.
I had a lot of fears or worries - coming on this trip.
Damn it Sophie - you’re 40 already lar - why are you scared?
Well, my dad still intimidates me - So………
There were 4 things foremost on my mind.
First worry was Immigration - what with Trump’s stand on migrants, and yes, I watch too much FOX NEWS. But what if they refused me even with ESTA. I had nightmares of a burly immigration officer escorting me to a waiting room of people with muslim names.
My 2nd worry was that I will not have enough baggage space. #yogaproblems I had to lug 8 days worth of yoga attire enough for 2 sweaty practices a day. And not forgetting potential shopping loot.
Apparently - if you’re flying to the USA, you can only bring in 2 x 23 kg, and I only owned 1 humongous luggage that has gone high 30s before, and I have a useless bright yellow carryon that can barely fit my toiletries and shoes.
My 3rd worry was that I cannot afford New York and my last worry is that I will not survive Level 2.
As what most worriers do, we start planning (and worrying) for the WHATIFs. And so I thought I had answer - for the first one - was to dress extra well. Brought an extra change of clothes and make-up in my carry-on. Funny thing was, after the 23 hours journey, it completely slipped my mind to change because I suddenly found myself at the head of the immigration queue. Oh god! #nearanxietyattack But it all went ok - think my big bright (fake) smile could have been the winner!
On the baggage situation, my bestie suggested buying a “bigger” and more useful carry-on luggage (and bin the yellow one) - so as option on my return to Singapore - I could check in the carryon luggage. wOn a whim, I dragged T to the Robinsons sales which was coincidentally on the weekend before I left. And scored an expandable 21-inch Traveller’s Choice luggage for S$190 (POST TRIP REVIEW - HIGHLY RECOMMENDED)
The worry on money was mitigated when I got a buyer for my lime-green Balenciaga bag.
4th worry - Well I did survive Level 2, in fact, it was an amazing and life-changing experience for me! (Check out my reflections HERE.)
I worry mostly about nothing. I know. I can’t help it. I’ve been trying on a mantra to “Relax with what is” but it’s freaking hard, when things are out of my control and oh gosh I am control freak. Oh dear!
So other than being a perfectionist, I am a control freak and worrier. Aiyoh!

That’s my story. And coming back on track - this blogpost is about how to survive NYC from a worrywart and the not-a-yogi in me, ended up doing more yoga than she anticipated, drinking hemp milk latte, going vegan the whole trip; sang mantras Hare Rama Hare Krishnan and meditated to So hum!
And a huge shoutout to FREETOURSBYFOOT.com which was a tremendous help to my surviving New York.
16 Useful Tips on How to Survive NEW YORK
Don’t forget to apply for your ESTA
If possible, include an extra day or 2 to recover from jet lag.
Choose a hotel close to a subway station.
Bring an extra luggage
Download City mapper app - although google maps worked just fine!
Take a cab from the airport
On the first day, get yourself a SIM card and plan a coffee date with yourself
Take the subway everywhere
Unlimited Metrocard vs Regular Metrocard
Be Prepared to Get Lost. (Walking/Direction Tips)
Wear comfortable shoes
Be mindful of your personal belongings.
What to Pack
Laundry woes solved
Recommended Touristy spots if you’re not the touristy sort
Bonus Tip/Advice
1 - Don’t forget to apply for your ESTA
- Even if you are a citizen of a VISA Waiver Country (VWC) [Click HERE to see a list VWCs]
The following Information was obtained from the ESTA website at https://www.estausa.com
What is ESTA?
ESTA is short for the Electronic System for Travel Authorization. The authorization is an online application that has replaced the tedious tourist visa process with a much simpler process for passport holders from the Visa Waiver Program (VWP) countries. Previously, a USA Visa application was necessary to obtain before visiting the United States of America, and a nearby US Embassy had to be visited as a part of the application process. However, the visa application is now referred to by passport holders in VWP countries as the “USA ESTA application” and is conveniently accessible online from all over the world. To obtain an ESTA, you are required to apply by submitting personal and travel related information through an online processing system. After submission you can expect a response within 72 hours.
When should you submit your ESTA Application?
You need to submit your application at least 72 hours before traveling, in order to make sure your authorization is available on the date of travel or immediately once you know you're going to be traveling to the United States. The ESTA authorisation is valid until your passport expires, or until two years after the approval of your authorization—whichever date comes earliest. I would encourage you to check your application for the expiry date and note that it can be revoked. So if you are not sure, double check.
How much does it cost? The total fees submitting an ESTA application on their website are US$83.00 excluding bank credit card fees if any. * Government Processing Fee - US$4.00 * Government Authorization Fee - US$10.00 if your ESTA application is approved * Third-party Processing Fee - US$69.00
Note: An approved ESTA that does not guarantee you admission to the United States. An approved ESTA signifies that you qualify to travel to the United States as part of the Visa Waiver program, but admission to the United States will be evaluated upon your arrival by a Customs and Border Protection officer. Based on their inspection, there may be a reason to deny you admission to the United States either under the provisions of the Visa Waiver program or the laws of the United States.
2 - If possible, include an extra day or 2 to recover from jet lag
- especially if you are travelling from Asia/Australia AND if you have an event to be 100% focused on.
I arrived 3 days before my level 2 started. Unfortunately I didn’t factor in jet lag.
Planned a Barry’s bootcamp with a friend and I ended missing the class as I fell asleep in the hotel while waiting for the time to pass.
Moral of the story is DON'T go back to the hotel if you are already out AND if you do go back, DON'T take a nap.
3 - Choose a hotel close to a subway station
I have been advised not to stay in Midtown as it’s very touristy and instead to stay in Flatiron, which was close to alot of studios or around Soho/Tribeca/Chelsea/Gramercy.
However Midtown was where I stayed, because T felt that it was safer for me - close to the Grand Central Station and it’s about 30 mins to Flatiron, Plus he sponsored my accommodation (so I said yes:).
I stayed at Westin Grand Central, and these were in the vicinity: Tudor City park, Ground Central coffee, Loft store, Juice Generation, pharmacies, Bath & Body Works on Lexington Ave, Grand Central Terminal, Grumpy coffee, T-Mobile on Madison, Taylor St coffee, Bryant Park, Whole Foods on 6th Ave, Times Square………...
Best to choose what you can afford, and I’d recommend a hotel, if you have lots of baggage (love the bellboys), and if you are only staying a few days. And don’t forget to google for reviews on tripadvisor and most importantly note that that internet hotel rate does not include tax.

4 - Bring an extra luggage
For the NYC shopping haul
I brought one as a carry-on for my first leg.
And I checked in when I departed so I could meet SQ Premium economy to the United States, baggage allowance of 23kg x 2.
Ps. You could buy a new luggage in Manhattan. But why waste time scurrying for extra luggage right?
5 - Download City mapper app
(although google maps worked just fine)
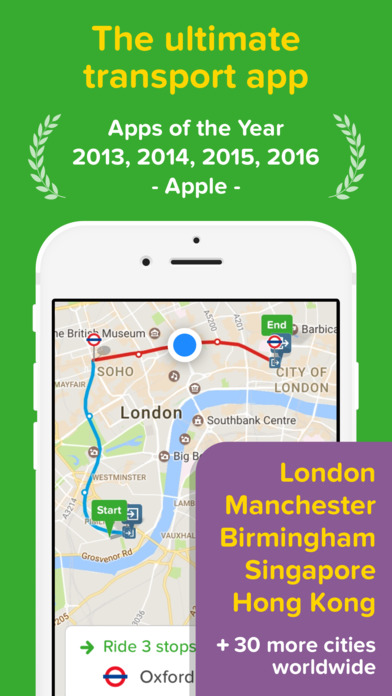
To download FREE APP (as at 25/7/17), IPHONE users click HERE to download; Android users click HERE .
I love reading maps. I had a map which I printed from the internet and I mapped out all the places I “needed” to visit. However I didn’t use it all when I was there - and neither did I use the tourist maps given by the hotel. I don’t think my effort was a waste of time, at least I have an idea where everything is.
The apps were absolutely a gem to use. The city mapper has a beacon that shows you which direction you are facing, so you can gauge if you are walking in the right direction. And both google and city mapper are pretty accurate in telling you what trains to take.
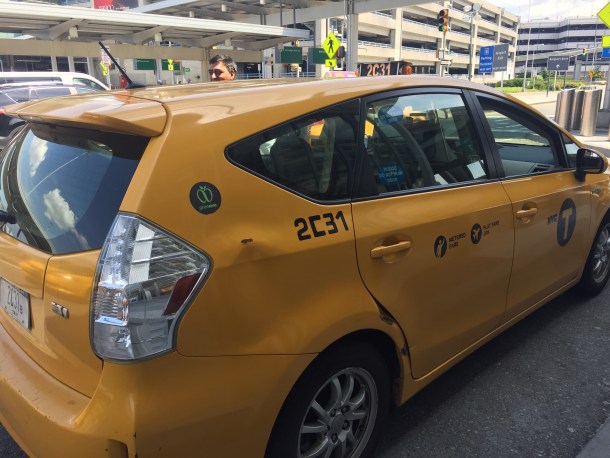
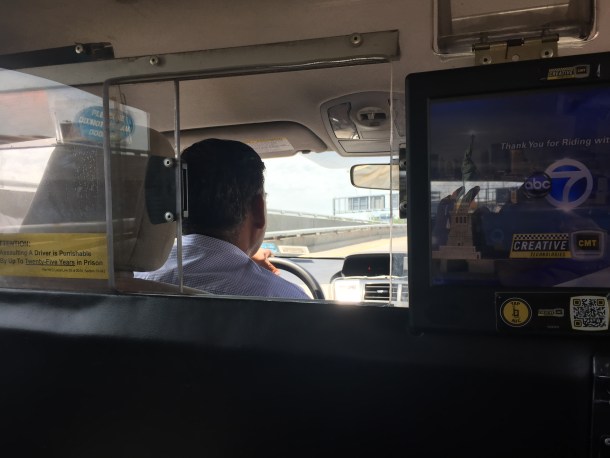
6 - Take a cab from the airport
I could have take an Air Train + subway, a shuttle bus or direct bus than to CAB it. After the long flight, I don't think I could swing it with the masses so I budgeted for a yellow cab.
There is a set fare from JFK to any destination in Manhattan, which is $52 (plus any bridge or tunnel tolls and a surcharge of $4.50 during peak hours 4pm to 8pm weekdays). Also, you should tip your driver 15% of the fare- about $8. Taxis will take cash or credit card.
Travel Time: Expect a minimum of 45 minutes, but it could take twice that long depending on traffic conditions.
Total Costs: I paid about US$70-75 for the cabs
The cab stand is right outside the terminal; just look for the signs.
your other Transportation options from JFK to Manhattan :
AIR TRAIN + SUBWAY:
After you arrive, follow the signs to the AirTrain. There are two AirTrain lines – be sure to get on the correct one that will take you to the stop you need.
Jamaica Station line: This line will take you to Jamaica Station where you can connect to the E, J and Z subway lines and also the LIRR (Long Island Railroad). Howard Beach line: This takes you to the Howard Beach subway station where you can take the A subway line.
Total Cost: $7.75 The AirTrain is $5 (children under 5 are free) and a single subway ride is $2.75
Travel Time: varies depending on your destination. But plan on 60-90 minutes to get to Midtown Manhattan.
AIRPORT SHUTTLE:
Two companies, GoAirLink and SuperShuttle (from airport) (to airport) are These are ride-sharing services that have the door-to-door benefits of a taxi but are significantly cheaper. For example GoAirLink and SuperShuttle. You can request for the shuttle service from the Ground Transportation desk in the Baggage Claim area or book online in advance.
Cost: Depends on your destination from the airport. As a point of reference, the cost from JFK to Grand Central Station Terminal in Midtown Manhattan will cost you between $20-$25 per person.
Travel Time: Can vary. If you are sharing a full van (11 passengers), you might be the first dropped off or you might be the last.
DIRECT BUS(NYC Airporter)
From JFK, you can find the bus just outside of the baggage pick up area at every terminal. The bus goes into Manhattan and drops passengers at at four locations:
Grand Central Terminal (42nd street and Vanderbilt Avenue) Bryant Park (42nd Street and 5th Avenue) Penn Station (West 33rd Street between 6th and 7th Avenues) Port Authority Bus Terminal (42nd Street between 8th and 9th Avenues)
Cost: US$18.00 per person (Children age 3 and under are free)
Travel Time: Approximately 90 minutes – 2 hours Hours of Operation: 7 days a week, 5 am-11:30 pm, runs every 30 minutes
7 - Get yourself a SIM card and plan a coffee date with yourself on the first day.

Although it was very tempting to stay in the room once I checked in to the hotel, I forced myself to get out and about And the coffee was good!!! One of my must-do on my list was to check out the cool coffee places around Manhattan - and so I headed to Taylor St Barista on Madison.
BUT FIRST, SIM CARD!
THERE'S NO SIMCARD AVAILABLE FOR PURCHASE AT THE AIRPORT! You would have to get in the City.
My SIM card was from T-mobile. I took the 10mb because I was worried that I would run out of data, which happened to me in Singapore, and being in a foreign country, I’d rather be safe than sorry. But if you are not an Instagram-addict and you don’t do work on your phone, then a 2GB data plan would be fine as long as your stay is less than 3 weeks.
PHONE PLANS AVAILABLE:
3 WEEKS TOURIST PREPAID PLAN
US$30 for up to 2 GB data (includes 1,000 minutes of talk and unlimited texts )
MONTHLY "SIMPLY PREPAID" PLANS
**PROMOTION as at 26Jul2017**US$50 for up to 10GB data (includes unlimited talk and unlimited texts )
US$45 or US$55 for 4GB and 6 GB data respectively (includes unlimited talk and unlimited texts )
"UNLIMITED ONE" PREPAID PLAN
US$75 for UNLIMITED data, talk and texts.
All prices before tax and fees.
8 - Take the subway everywhere
Manoeuvring the subways was relatively nightmare-free except at peak hour. I experienced that once - I felt like clueless goat - being herded by the massive crowd of New Yorkers. “No, I’m not going that way!!!"
Give yourself approx 30-45mins allowance to get to your destination (if you are early, you can grab coffee)............. unless you are very sure, you know where you are going. (See my Tips on "Prepare to Get Lost"). Otherwise, the chances of you walking in the wrong direction once you come out of the station, is 90%, and that can involve an add an extra 15 mins to your travel time.
Know in advance the train you are taking and if you are heading Downtown or Uptown. USE GOOGLEMAP OR CITYMAPPER. Once you know the direction, you can choose the right entrance.
At the bigger stations for example, the Grand Central Terminal, where it is an "interchange" - you will be able to access both Downtown and Uptown entrances when you are underground. (Look at the signs above the staircases and it will also show the symbols for the trains)
However some stations have completely separate entrances for uptown and downtown trains and it is not possible to get to the opposite platform without returning to street level. You have to make sure you use the right entrance or you might end up on the wrong train. Some stations though have underpasses which allow you to walk through a tunnel underneath the subway tracks to get to the other side. Depends on your luck, I guess. :)
I remember going back around 9pm on the weekend and didn’t realise until like 4 stations past that I was across the waters towards Brooklyn, when I should be going uptown!!
Note that once you enter the wrong turnstile, you’d might lose US$2.75 (on the regular Metrocard) unless some kind soul notices your predicament and opened the emergency door for you.
Watch out for EXPRESS TRAINS - because they would not stop at the usual stops. Listen to the conductor and watch the station list to know where your train stops. But if it happens, don’t worry, there are sure to be others on the same boat, so follow them obscurely once the train stops. If not, ask for directions!
At night, some trains do not function, or perhaps they could be delays due to train misfunction, so if the train that usually takes you home is not available, ask someone if it does. (The city mapper and goggle maps may or may not be updated with this information)
I would also recommend that you remember how many stops to your next stop, because sometimes the train announcement is muffled, and you may not hear the name of the station. Or just remember the stop name.
9 - Unlimited Metrocard vs Regular Metrocard
On hindsight, I should have purchased the 7days unlimited Metrocard, but I bought the regular Metrocard instead, where a one-way train ride would cost US$2.75 each. But my NYC stay was staggered; 3 days pre and post training. If I had like more than 4 days uninterrupted it would have been a no-brainer. They said I should ask myself if I use the train at least 12 times. I didn't know the answer that. lol Anyways savings was a couple was maybe 30 cents per ride, and yes maybe the inconvenience of having to top up ever so often and scurrying for exact change - is there. Oh well - it's just money. And bottom line - I got to where I want anyways.
HUGE CREDIT GOES TO www.freetoursbyfoot.com and
becomeanewyorker.com for the valuable information on their website.
Unlimited MetroCards
costs $31 for a 7 day pass and provides great savings
for 13 trips = $2.38/ride
for 20 trips = $1.55/ride
for 25 trips = $1.24/ride
reduced fare is just $15.50
can only be used by 1 person
must wait 18 minutes before using again
unlimited transfers
there is also a 30 day pass for $116.50 ($58.25 reduced)
Pay-Per-Ride / Regular MetroCards
costs $2.75/ride when you purchase multiple rides, otherwise it costs $3 per ride.
11% bonus for every $5.50 purchased. So, a $5.50 purchase gives you $6.10.
free subway-bus and bus-bus transfers within 2 hours. Subway to subway transfers included within the system.
up to 4 people can use one MetroCard.
Seniors 65 and older and those with qualifying disabilities are eligible for reduced fares.
Note:
For both types of cards, there is a US$1 non-refundable deposit to obtain your MetroCard.
The turnstiles doesn't have a dedicated entrance and exit. If It's peak hour, you either have to wait for the other side to go through, or find a line that goes the way you want it to go.
To enter - you have to slide/swipe your card (the right way) on the thingy at the turnstile (no idea what you call it, but I watched people do it, so I just follow).
To exit - just exit the turnstile. There's no need to insert a card.
Be mindful of the "MEAT GRINDER. There are two types of turnstiles: the regular turnstiles you are used to from theme parks and there are what people call ‘meat grinders’. Meat Grinders are tall, vertical turnstiles that you swipe into and enter what almost looks like a cage. Once inside, you push forward almost like a revolving door and you pass into the station. MAKE SURE YOU PUSH THE GATE CLOSES TO YOU! DON'T REACH FOR THE FURTHEST GATE; BECAUSE IT MOVES ONLY A QUARTER WAY.
These are my experiences when using the regular MetroCard:

**Be sure to keep the card and add money to it when it is running low, because you don’t want to have to buy another card and pay $1 again just for a card!
**I got my first card via the station master at Grand Central and thereafter I topped up via the machines available at every station.
**Be mindful of peak hour commuters, and the queue and crowd for the machines/station master.
**The machines take in cash and card. If paying via cash, the machines only have max US$9.75 in change.
**You can view the balance of your card in a small screen just in front of sliding thingy, as you slide your card through.
Check Out this video on how to purchase a metro card
And watch this video on how to ACTUALLY USE the Metro card:
10 - Be prepared to get lost (Walking/Direction Tips)
I thought I have a pretty good sense of direction. I almost never get lost. But once you emerged from the depths of the obscure underground station, everything looks the same. Taking the trains were easy - as long as you know if your destination is Downtown or Uptown, but the walking to the East or to the West gets complicated when the East is not really the East, depending on the location of your station.
So: a) Have your Citymapper handy, and slowly turn or start walking a couple of steps to see if you are facing the direction you are supposed to go.
b) Even if you think you are going the right direction, double check the Citymapper/goggle.
c) The Avenues (1st - 12th Ave) and not forgetting Lexington Ave, Madison Ave and Broadway runs North to South - and that’s the general direction of the trains - Uptown (north) and downtown (south).
d) The streets runs adjacent to the Avenues from East to West. Note that: * West Side is the area west of Fifth Avenue; East Side is the area east of Fifth Avenue. If you are walking towards East, you might still in the Westside. It did not make sense to me - but anyways I will refer you back to point (a).
e) Know that you don’t actually know where you are going. On the first day, I was walking back from Whole Foods from Bryant Park and I accidentally left by a different entrance and I was in my world, when I realised that I don’t see the top of my Chrysler building which is my landmark for my hotel. And on the 3rd day as I left the Grand Central terminal, again I didn’t realise I left via a different exit, and went uptown instead of east side?
f) Just enjoy the experience of being lost and ensure you have the citymapper or google handy.
11 - Wear comfortable shoes
I know we wanna look good on the streets, but seriously unless you want to uber or cab, WALKING is the way to survive the streets of New York City. Anyways, who wants to be stuck in traffic?
Or get yourself a NIKE coz it's super fashionable to be wearing them with a dress heheh . I'm super glad NIKE has a stability range for flat-footed people like me - it's not as supportive as my NEW BALANCE running shoe, but its great for walking.
12 - Be mindful of your personal belongings
One thing I was worried about was being pickpocketed. Fact matter is I felt safe, and was carrying a cross-back bag initially, which was recommended in most travel forums but on the 2nd day, I was comfortable enough with a shoulder bag although I was pretty anal about checking in constantly to ensuremy bag is zipped up and my wallet is still in my bag.
AND Bring an extra shopping bag for the just incase of the emergency shopping. :D
13 - What to Pack
Tricky Question - I had to also pack my yoga attires for the yoga training, which is another ballgame altogether. Then again, I did overpack when I shouldn't.
"Sophie - you know that if you are going to a fabulous city like New York and Sydney, you are going to shop and being alone, the spending don't stop even though you told yourself you're not going to shop, YOU'RE GOING TO BUY STUFF!"
Ahah
If you are a self-proclaimed shopaholic, please don’t bring too much clothes. And in a worst case, there is always a laundromat.
I was there in the summer month of July right after the 4th July celebration. I was walking around in shorts and yoga leggings, and switched between my Havaianas and my Nikes. Brought a scarf and jacket along because it does get chilly especially in the aircon shops and in the evenings. Some days it is as hot as Singapore! Don't forget sunnies, sunscreen, extra battery pack and nice sandals and dressy dress for potential dinner dates with friends.
14 - Laundry Woes Solved!
Now if you are not the shopping sort, nor do you have friends living in the City whom you can borrow the washing machine for the day - you may run out of clean clothes to wear. #firstworldproblem
"Laundromats" are easily available - just google for “laundromats” or “cleaners”. Mine was maybe 3 streets away. It wasn't worth paying US$14 to Westin to launder one tee shirt!! Do the "wash and fold" and it’s usually next day pick up and I paid US$13 for bagful of clothes (2-3 days worth)
15 - Recommended Tourist spots
I have to admit that I wasn’t much of a tourist ( I didn’t want to spend money on them). I was too busy on this trip to get to the yoga/dance studios, discovering new coffee places and getting lost. And I took pictures of people, buildings, streets, coffee cups. :)) AND SQUIRRELS!
But I did walked the essentially FREE tourist spots like the:
Central Park (Uptown)
Times Square (Midtown)
Grand central Terminal (Midtown)
Flatiron (Flatiron)
Chelsea High Line (Chelsea / West Side)
Washington Square Park (Greenwich Village)
Brooklyn bridge (Downtown)
City Hall (Downtown / Financial District)
Battery Park (Downtown / Financial District)
I traversed across to the Upper West Side to get LEVAIN Oatmeal Raisin cookies for a friend of mine. And I probably walked across most areas of NYC to find GROM gelato (supposedly the best) cecream and did all the major shopping malls (not recommended) like Macy's to Bergdorf Goodman and back down to Bloomingdales on the search for the elusive Calvin Klein classic cotton tees.
I took pics of the Chrysler and Empire state building, which was massively beautiful from afar. I didn't need to go up.
One of the things on my to-do list was the Statue of Liberty. However on that day - it was a pretty windy day, and the waters were very choppy. I get sick going across to Bintan Island, so it was a no go, but I did get a nice pic from walking through Battery Park.
9-11 Experience was also on my list, but it was closed by the time i arrived. So I took a couple of pictures of the 9-11 memorial and I did also enter the Occulus, though I don’t know what’s the big hype about it. And THIS article sums it up.
If there is a NEXT TIME for NYC, these are will be on my to-do list:
Get tickets in advance for the Tonight show with Jimmy Fallon or Saturday Night Live via NBC
Check NYCpark website for free events or concerts at Bryant Park or the other parks. Timeout , Exploreist.com, NYCGO also has a great list plus other resources.
Go to the Top of the Rockefeller Centre
Assist at Lyon’s Den.
Try a shadowboxing class
Take the ferry to Staten, and stay in Staten for a class at 5 Boro
Get myself to Brooklyn to see the Bushwick Street Art
DO the 9-11 experience
Go out salsa dancing
Meet up with new found friends
Do the outlet shopping
And I'm sure I'll find something else to add to my to-do list. hehe
16 - BONUS TIP/ADVICE
“Once in a while look up. Even if you are lost, and rushing to get somewhere, because there are some views that cannot be missed.
Step aside if you are gonna look up. Or you are looking at your phone.
Be prepared to get lost.
And enjoy the experience because you are on holiday!!
Relax with what is. ”
OH MY GOD!
I made it through the list (albeit 9 hours later). I didn't think this would take that long, but I guess I’m in it for the long haul.
I know as a yoga teacher, I’m supposed to write yoga stuff, but I’m writing to - my SWEET PEEPS who loves yoga and other non-yoga stuff too.
I hope you enjoyed reading this post and do share. #sharingiscaring ANDI'd appreciate any feedback on this blog post, which is something out of my comfort zone but if you like to see more, let me know.
And if you have any questions, please do not hesitate to comment below!
♥♥♥♥♥